REVIEW · PALM SPRINGS
Joshua Tree National Park Self-Guided Driving Audio Tour
Book on Viator →Operated by Adventures with Action · Bookable on Viator
Follow the GPS voice through weird desert wonders. This self-guided Joshua Tree National Park driving tour is a smart way to see the park in your own car while staying on track with location-based hands-free audio and offline maps. I like that you can pause, snack, and detour at your own pace, and I also like the lifetime access so you can reuse the route on future Joshua Tree trips. One drawback to plan for: you must download the app and tour while you have strong signal, and Joshua Tree entrance needs an entry pass that this tour does not include.
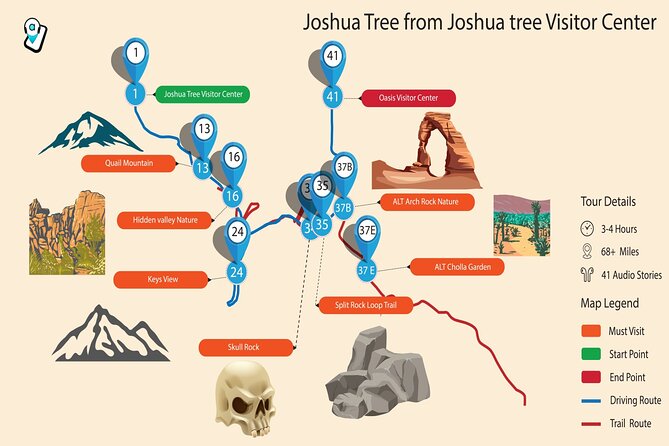
You start at the Joshua Tree Visitor Center and follow a route that covers about 66 miles and typically takes 3 to 4 hours, with 60+ audio stories along the way. A nice bonus is the Hidden Valley Nature Trail content, including an easy about 1-mile walk you can do when you want.
In This Review
- Key points you’ll care about before you go
- Why this self-driving audio tour works so well in Joshua Tree
- Price and value: $16.99 per group can pencil out fast
- Offline-first setup: how to make sure audio works in the park
- Entering at the Visitor Center: how the route and audio cues feel
- The full route reality check: 66 miles, 60+ stories, 3 to 4 hours
- Joshua Tree town stop: snack, pick up basics, and reset your mindset
- Samuelsons Rock: the moderate hike that feels like a secret message
- Willow Hole: an oasis you will not trust until you see it
- Hemingway Buttress and the scramble factor: boulders with big personality
- Hidden Valley Nature Trail: the one-mile break from the driving
- Intersection Rock and the outlaw-style climbing lore
- Cap Rock: short trail, big plant info moments
- Lost Horse Valley and the McHaney Gang story thread
- Lost Horse Mine Loop Trail: ruins, vistas, and summer shade reality
- Queen Valley: abandoned mine lore with a darker edge
- Skull Rock: roadside access plus an easy two-mile option
- Sky’s The Limit Observatory: science by day, stars by night
- Oasis Visitor Center and the southern gate detour option
- Practical tips to avoid the most common problems
- Should you book this Joshua Tree self-guided driving audio tour?
- FAQ
- How long does the Joshua Tree self-guided driving audio tour take?
- What does it cost?
- Does the tour work without cell service or Wi‑Fi?
- Do I need to download an app?
- What do I need for Joshua Tree National Park entry?
- Where does the tour start?
- How do the audio stories know when to play?
- Is there a walking trail included besides the driving?
- Can I pause and resume whenever I want?
- What are the activity hours?
- Is free cancellation available?
Key points you’ll care about before you go
- Offline-ready planning: download the tour in advance so weak park signal does not stop playback.
- Location-triggered audio: stories play automatically based on where your phone detects you are in the park.
- Car-first flexibility: go at your own pace, pause freely, and do only the hikes that fit your day.
- Great value per car: price is for the group in your vehicle (up to 4), not per person.
- Built-in highlights route: the driving loop hits big-name stops like Samuelsons Rock, Willow Hole, and Skull Rock.
- Bonus walking time: Hidden Valley Nature Trail adds an easy short nature walk to balance the driving.
Why this self-driving audio tour works so well in Joshua Tree
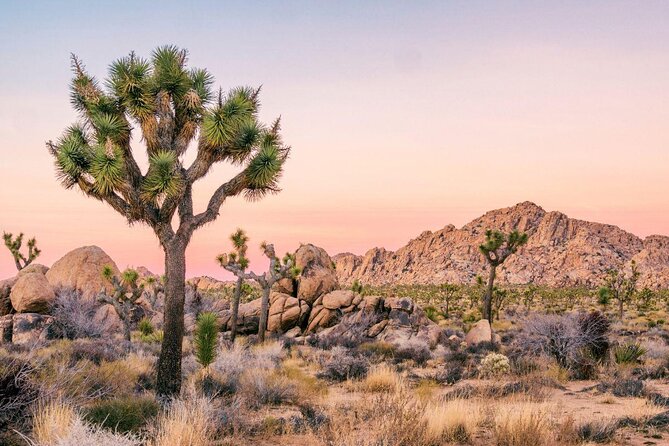
Joshua Tree can feel intimidating if you are trying to do it all on your own. The roads are scenic, but the park is spread out, and you can burn time wondering what to see next. This format fixes that with a guided route you drive yourself, plus audio that points you toward each stop as you go.
I like the car comfort here. You are not herded into a single pace, and you are not stuck waiting for a group to catch up. If you want a quick photo and keep rolling, you can. If you want to take a longer look at a viewpoint, you can pause the audio and spend the time.
The other big advantage is that the audio is not just a lecture you press play on. It is designed to play based on location, so you get that I’m-here-so-the-story-begins feeling as you approach each area. That matters when you are bouncing between roadside sights and short trailheads.
The best fit is straightforward: this is for anyone who wants maximum control with wayfinding support. You still drive, choose your stops, and keep your own rhythm.
You can also read our reviews of more tours and experiences in Palm Springs.
Price and value: $16.99 per group can pencil out fast
This tour costs $16.99 per group, up to 4 people in your vehicle. That pricing is the big reason it can feel like a bargain compared with per-person guided options.
Here is the value math I would use: if you are traveling as a couple, you split the cost and effectively pay less than most guided excursions. If you are a small family or a few friends in one car, you also avoid paying multiple times. Even if you skip some hikes and just do the driving highlights and viewpoints, you still get the audio stories and route guidance that make the day click.
One more practical point: you can reuse it. The tour is listed as new, lifetime access, no expiry, so if you come back to Joshua Tree for another sunset or a different season, you are not re-paying.
Offline-first setup: how to make sure audio works in the park
Joshua Tree is famous for being an unplugged place, and this tour is built around that reality. The tour includes offline maps, and it is supposed to work even when you have no cellular or Wi‑Fi.
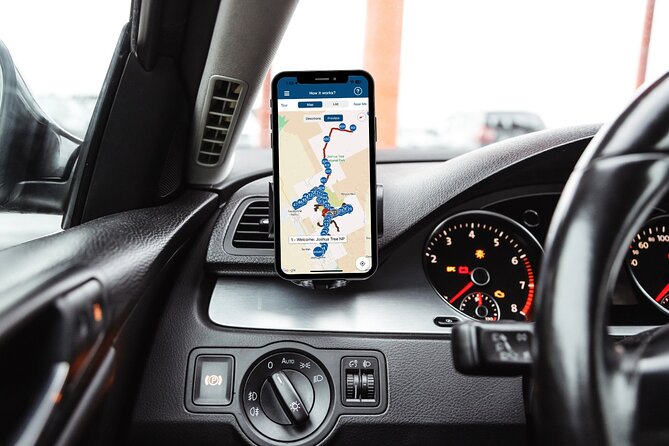
That said, you only get the offline benefits if you do the prep right. After booking, you get instructions and a password by email and text. You then download Action’s Tour Guide App and the specific tour content. The guidance is to download while you still have strong Wi‑Fi/cellular, because signal is often poor inside.
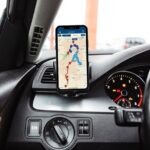
Onsite start is simple: open the Action’s Tour Guide App, launch the correct tour version (based on your planned starting point and direction if there are multiple), then enter the first story’s point. From there, the audio should play on its own based on your position.
If you want your audio loud and clear while driving, the setup notes suggest connecting your phone to your car stereo via Bluetooth, USB, or AUX. If you prefer, you can also use headphones for walking segments.
If anything goes wrong at the start, the support team is there to help. That is a big deal because the park can be a tough place to troubleshoot if you are relying on signal.
Entering at the Visitor Center: how the route and audio cues feel

Your tour starts at the Joshua Tree Visitor Center. There is no guide meeting you. Instead, you follow the route and speed limit, and you let the app cue each story.
A helpful way to think about it: you are building a “guided drive” where each stop has two parts:
- a place to pull in or park near (or at least access from the road),
- and then an optional walk or viewpoint time window, depending on what that stop offers.
You can pause at any time, which is key for real life. If your group wants a bathroom break, or you want to wait for light to change over a rock formation, you are not stuck with a rigid schedule.
One small caution from the practical side: while audio gaps can happen, the intended experience is not meant to have huge stretches with nothing happening. If your playback seems to stall, the fix is usually to confirm you are using the actual downloaded tour (not a demo) and that you are following the correct route and pace so the location triggers catch up.
The full route reality check: 66 miles, 60+ stories, 3 to 4 hours
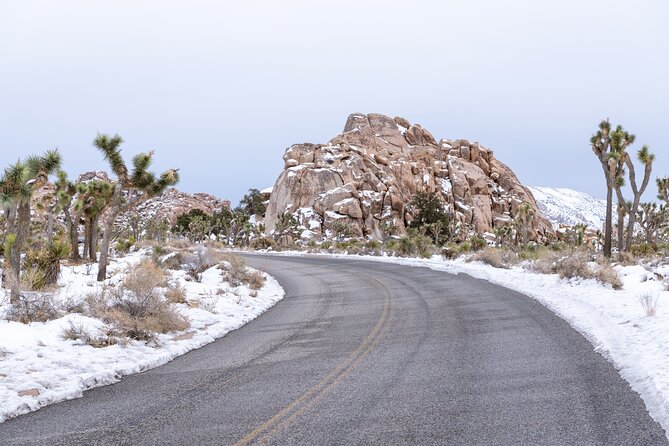
The driving route is listed as over 66 miles with more than 60 audio stories, and it typically takes 3 to 4 hours to complete.
That time estimate matters because your day can expand fast once you start walking trails. Some stops are essentially roadside, so you can be done quickly. Others are tied to hikes like a moderate trail to Samuelsons Rock or a longer trek to Willow Hole.
My suggestion is to treat the time as a target, not a promise. If you do most optional hikes, you are choosing a longer day. If you do mostly driving highlights plus a couple of short walks, you will likely land close to that 3 to 4 hour range.
Joshua Tree town stop: snack, pick up basics, and reset your mindset
Before you fully enter the park route, you pass through the town of Joshua Tree. The tour notes this as a good place for a quick snack or souvenir before or after the park drive.
This is not just a convenience stop. It is also a way to shift from city pace into desert pace. Joshua Tree mornings and sunsets can move fast, and having a plan for food and water timing (even if it’s just grabbing something simple in town) keeps your drive relaxing instead of rushed.
Samuelsons Rock: the moderate hike that feels like a secret message
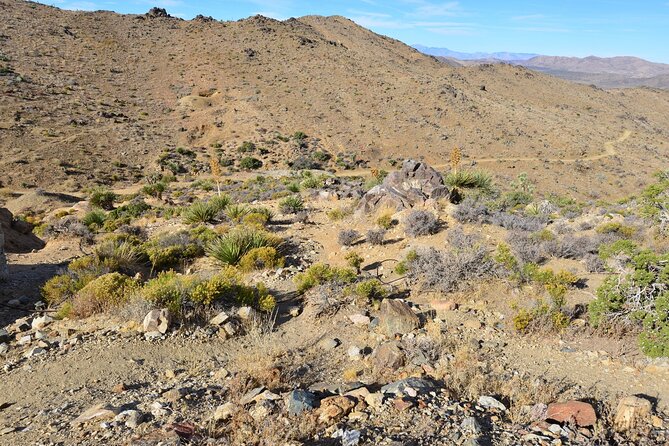
One of the first true “hands on feet” opportunities is Samuelsons Rock. You access it via a moderate 3.3-mile trail. The story angle here is what makes the stop interesting: almost 100 years ago, John Samuelson etched messages and declarations into the rock, and those markings are still there.
What I like about this kind of stop in an audio tour is that you get context as you walk. Without the audio, it can be easy to see rocks and wonder what you are looking at. With the audio, you have a thread: who wrote it, why it’s here, and why it still matters.
Possible drawback: 3.3 miles is not a two-minute stroll. If anyone in your group has limited mobility or just wants quick stops, you might choose to enjoy it from a short time window only, or skip it and focus on more roadside-friendly sights.
Willow Hole: an oasis you will not trust until you see it
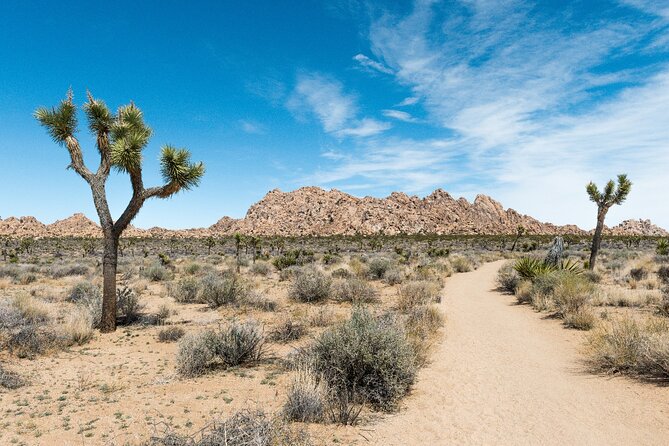
Next is Willow Hole, reached by a 7-mile trail that leads to a seemingly miraculous oasis in the desert, surrounded by willows.
This is the kind of stop that can change how you see the rest of the park. In Joshua Tree, the desert can feel like everything is dry and harsh—so an oasis story lands hard, especially because many visitors initially think it is a mirage.
Possible drawback: 7 miles is a commitment. If you are short on time or you are heat-sensitive, you may prefer other stops with shorter trails. The tour still helps you by making the decision easy: the audio cue sets expectations so you can plan your day before you start walking.
Hemingway Buttress and the scramble factor: boulders with big personality
Hemingway Buttress is one of the park’s best-known climbing areas. The tour frames it as a dramatic granite formation that rises sharply from the earth, with lots of boulders that are fun to scramble on.
Even if you are not climbing, this stop works because it has motion built in. You can explore where people like climbers gather, look at how the rock juts, and take in the scale without needing advanced skills.
Possible drawback: scrambling is not the same as a maintained trail. If your group prefers stable, level walking, you might keep to viewpoints and avoid rougher footing. Also, if you are traveling with little kids, this is a place where you should supervise closely.
Hidden Valley Nature Trail: the one-mile break from the driving
The tour includes a Hidden Valley Nature Trail bonus, and the walk is described as easy, about one mile.
I think this is a smart pairing with the driving route. Driving lets you cover a lot. Hidden Valley adds a shorter, more human-scale nature pause. You get to stretch your legs, look for details in the rocks and plants, and then you are right back in the car before fatigue sets in.
Because it is about a mile and labeled easy, it is a great “middle option” for mixed groups. Someone who is excited for a hike can do it. Someone who just wants photos can still enjoy it without committing to a longer trek.
Intersection Rock and the outlaw-style climbing lore
Intersection Rock is described as a hub-like spot that you can see from far away. It also serves as a popular climbing location with many routes—names are included in the tour story like Knuckle Cracker and Sympathy to the Devil.
This stop is ideal for travelers who like narrative detail. The rock has scale, and the audio context turns it into more than a photo op. You are not just looking at a cliff; you are hearing about how people engage with it and how the routes got their character.
If you’re traveling with a camera, this is also a good place to slow down. Big silhouettes against bright sky often look best with a bit of time spent watching the light shift.
Cap Rock: short trail, big plant info moments
Cap Rock is a strange formation with a small boulder perched on top of a larger rock. The tour includes a quick quarter-mile trail described as full of information about local flora.
This stop is a good “information payoff.” After you’ve spent your attention on dramatic shapes—holes, buttresses, mesas—Cap Rock brings it back to living desert details: what grows there and why it matters.
Possible drawback: a quarter-mile can still be too much for someone who needs zero walking. If your group is mainly driving and stopping briefly, you can still use the formation as a quick viewpoint and read the audio cues as you pass.
Lost Horse Valley and the McHaney Gang story thread
Lost Horse Valley gives the tour its classic Wild West thread. The name ties back to McHaney Gang misdeeds, and the audio adds the story of an overconfident miner trying to recover stolen horses.
This is one of those stops where the audio makes the geography more meaningful. The land is not just scenery; it’s connected to human stories—both the myth and the reality.
What I like here is pacing. It balances the more physical stops (hikes and scrambling) with a story-driven moment you can enjoy from the car.
Lost Horse Mine Loop Trail: ruins, vistas, and summer shade reality
The Lost Horse Mine Loop Trail is described as about four miles and takes you to remains of one of the most successful gold mines in the region. The audio also highlights desert flora and excellent views.
One practical note is explicit: in summer, expect a lack of shade on this trail.
This matters because it changes how you plan the day. If you are going in hotter months, you might do this loop early or swap it with a shorter option. If you do it, it is worth knowing that comfort might depend more on timing than on the trail itself.
Queen Valley: abandoned mine lore with a darker edge
The tour also includes Queen Valley, described as another abandoned mine. The story connects the gold to motive behind at least one murder and other events.
If you like your desert history with a bit of edge, this stop delivers. It also helps keep the audio variety going: you get mining history, outlaw lore, and human drama layered over the natural features.
Possible drawback: if your group hates dark history or is traveling with younger kids, you can handle it by doing this stop as a quick drive-by, letting the audio roll only if everyone is okay with it.
Skull Rock: roadside access plus an easy two-mile option
Skull Rock is described as an iconic granite formation that looks like a human skull. It is easily accessible from the roadside and also functions as the trailhead for an easy 2-mile walk that is among the park’s most popular hiking trails.
This is a strong stop because it offers two styles of engagement:
- quick viewpoint access from the road,
- or a short hike that brings you closer to the signature shape.
If you are traveling with mixed energy levels, it’s an easy win. Everyone can see the formation, and only the hikers need to commit to the two-mile segment.
Sky’s The Limit Observatory: science by day, stars by night
The tour includes Sky’s The Limit Observatory and Nature Center. This stop is framed as a place to learn about flora and fauna, plus stars above. Joshua Tree is noted as a dark sky area, so the tour suggests trying to stick around after dark for stargazing.
Even if you do not plan a nighttime visit, this is still a meaningful pause in the middle of a driving day. A nature center gives you grounded facts in between the legends, and the sky angle adds a different kind of wonder than rocks and trails.
Practical consideration: if you do want stargazing, the audio route timing matters. Plan your day so you do not finish too early and miss the night sky.
Oasis Visitor Center and the southern gate detour option
The tour’s final stop on the main route is the Oasis Visitor Center, located in Twenty-Nine Palms. It is described as not far from where you began.
If you want more park driving, there’s also a detour option: the route proceeds south through the rest of the park and exits out the southern gate.
Your tour ends back at the meeting point (so the “loop” feeling is part of the design). If you choose the detour, you are essentially extending your drive after the main sequence, depending on how much time you still have.
Practical tips to avoid the most common problems
A self-guided audio tour is only as good as your setup. Here’s what I’d do to keep the day smooth, based on the tour’s design notes.
- Download on strong signal before you go in. The park’s weak connectivity is exactly why offline maps matter. If you wait until you arrive, you can end up stuck.
- Make sure you start the correct tour. If multiple versions exist, choose the one that matches your planned starting point and direction.
- Connect audio to your car if you want hands-free listening. Bluetooth, USB, or AUX is the intended path.
- Follow the route and speed limit. Location-triggered audio relies on you matching where the route expects you to be.
- Start early enough for viewpoints. One consistent lesson from practical travel planning: popular spots fill in. If your goal includes sunset, you need breathing room for waiting.
- If something does not trigger, contact support. There is help available if audio issues happen, and getting it sorted early is the difference between a great day and a frustrating one.
Should you book this Joshua Tree self-guided driving audio tour?
Book it if you want a guided highlight loop without giving up control of pacing. This works well for first-time Joshua Tree visitors who feel a bit intimidated, and for groups who want a cheap way to get story context while still doing some hiking on your own terms.
I’d skip or think twice if your group cannot handle downloads and app setup before arrival, or if you strongly prefer a live guide who can adjust on the fly. Also, if your entire plan is limited walking, remember that some key stops are tied to longer trails like Willow Hole and Samuelsons Rock.
If you’re the kind of traveler who likes learning while you drive, planning a few short hikes, and keeping your day flexible, this is a solid value choice for Joshua Tree.
FAQ
How long does the Joshua Tree self-guided driving audio tour take?
It typically takes about 3 to 4 hours to complete.
What does it cost?
The price is $16.99 per group, up to 4 people in your vehicle.
Does the tour work without cell service or Wi‑Fi?
Yes. Offline maps are included, and the tour is designed to work after you download it in advance.
Do I need to download an app?
Yes. You download Action’s Tour Guide App onto your phone and then access the tour using the password sent after booking.
What do I need for Joshua Tree National Park entry?
An entrance pass is required to visit Joshua Tree National Park, and it is not included with this tour.
Where does the tour start?
The tour begins at the Joshua Tree Visitor Center. No one meets you at the start.
How do the audio stories know when to play?
The audio stories play automatically based on your location as you follow the recommended route.
Is there a walking trail included besides the driving?
Yes. The tour includes a bonus tour for the Hidden Valley Nature Trail (about a one-mile easy trek).
Can I pause and resume whenever I want?
Yes. You can pause anywhere, start and stop when you like, and continue at your own pace.
What are the activity hours?
The listed hours are Monday through Sunday from 8:00 AM to 5:00 PM.
Is free cancellation available?
Yes. You can cancel up to 24 hours in advance for a full refund.