REVIEW · YELLOWSTONE NATIONAL PARK
Grand Teton and Yellowstone Self-Guided Driving Tours Bundle
Book on Viator →Operated by Adventures with Action · Bookable on Viator
A drive you can listen to.
This self-guided audio bundle strings together two of the best park road trips in the U.S., with location-triggered stories for geysers, waterfalls, lakes, wildlife and the big Teton viewpoints—plus offline maps for when service drops out.
I like the offline setup and the fact you can run it hands-free once your phone is paired to your car. I also love the value per car: it’s priced per group (up to 4), so the cost can feel reasonable compared with busier guided options.
One thing to watch: you need to download and set everything up before you’re deep in the parks, and audio works best when you stay on the planned route and keep to the posted speed suggestions.
In This Review
- Key things I’d plan around
- Entering the driver seat: how the audio tour actually works
- Teton Village to Rockefeller Preserve: starting with sharp views
- Taggart Lake Trail and the glacier history pullout
- Jenny Lake, Cascade Canyon, and Mount Moran: the Tetons’ postcard trio
- Jackson Lake Dam and the Teton viewpoints: where detours pay off
- Yellowstone loop essentials: West Thumb to Old Faithful and Grand Prismatic
- Mud pots, geyser basins, and the Norris temperature brag
- Mammoth terraces, Boiling River, and the falls and hot-water variety
- Lamar Valley and Yellowstone Lake: the wildlife-and-water finale
- Timing, setup, and how to prevent audio stress
- Who should book this self-guided audio driving bundle?
- Should you book this Grand Teton and Yellowstone audio drive?
- FAQ
- How much does the Grand Teton and Yellowstone self-guided driving bundle cost?
- How long does the tour take?
- Is this a guided tour with a person who meets you?
- Does it work offline?
- What do I need to set up before I start driving?
- What audio setup works best in the car?
- Are park admission tickets or reservations included?
- What are the opening hours?
- Do park roads and audio require me to follow a specific route and speed?
Key things I’d plan around
- Offline-first audio so your trip doesn’t stall when cellular signal disappears
- Audio that starts and continues based on where you are, not on you pushing buttons every time
- Two-region road trip flow: start with classic Tetons viewpoints, then connect into a full Yellowstone loop with major geothermal stops
- Wildlife-friendly timing suggestions baked into the stops, especially around morning and dusk areas
- Lots of content: 50+ miles per tour, 50+ audio stories, and about 3–5 hours to complete each park section
- Optional detours (Cattleman’s Bridge, Oxbow Bend) so you can shape the drive without feeling lost
Entering the driver seat: how the audio tour actually works
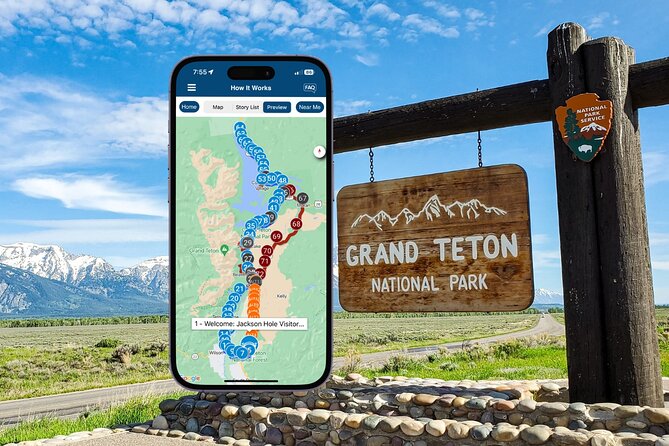
What makes this bundle feel different is that you’re not just getting facts in a packet. You get a phone-based guide that plays on its own as you drive, then cues you at the next stop. The goal is simple: you see the place, the story starts, you park when you want, and you move on without wrestling with an app menu.
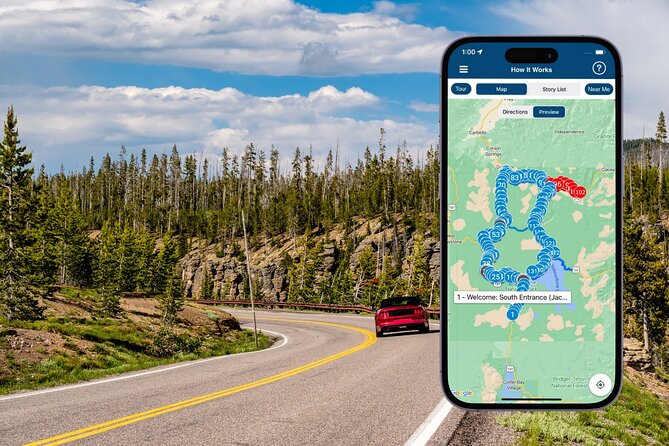
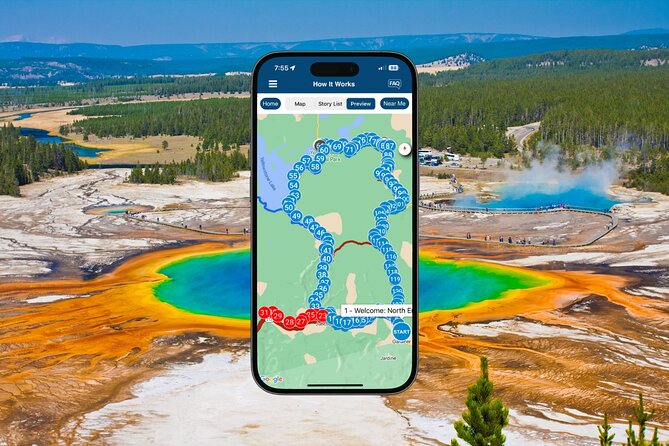
You download a separate Action’s Tour Guide app and use a password sent by email/text. The key practical point is that you must download while you’re in strong Wi‑Fi/cellular. After that, it’s built to work offline, including offline maps, which matters a lot in Yellowstone where signal can be unpredictable.
For audio, you can connect your phone to your car stereo with Bluetooth, USB, or AUX. If you’re stepping out for short walks at pullouts, headphones can also help so you don’t miss the narration. There’s also compatibility with Apple CarPlay (and Android Auto support is on the way). In other words: you’re setting things up for a smooth, low-friction road trip.
Finally, the tour expects you to follow the tour route and posted speed limits. If you speed up, stop, or wander too far off plan, audio can fall behind and you may have to restart or re-find your place.
You can also read our reviews of more tours and experiences in Yellowstone National Park.
Teton Village to Rockefeller Preserve: starting with sharp views

The Tetons portion opens right as you roll through Teton Village, a real-ski-town kind of start. If you’re traveling in winter, you’ll see why this area gets talked about for intense skiing; even in summer, it sets the tone for rugged mountain scenery.
Next comes the Laurence S. Rockefeller Preserve. This is one of those stops that’s worth slowing down for—not because there’s one big landmark, but because it’s a wildlife-focused stretch. The narration points out elk and other mountain critters, and it’s a reminder to scan the road edges and overlook areas for animals that blend into the terrain.
Then you’ll get a small detour-style moment: a single-room cabin that’s actually an Episcopalian church. The value here is the payoff. You’re not just reading about history; you’re stopping where the views let you understand why a tiny building like this would matter in the first place.
This whole start sequence is good for jet lag and family pacing because it mixes easy pullouts with quick stories. You can keep driving, or you can park for a couple minutes and let the narration do the teaching.
Taggart Lake Trail and the glacier history pullout
After the preserve and cabin stop, the tour points you to Taggart Lake Trail, described as a 6-mile loop leading to two huge, pristine lakes: Taggart Lake and Bradley Lake. If you want the Tetons in a classic way—clean water, dramatic peaks, and a hike that feels worth it—this is one of the best targets on the route.
A drawback: a 6-mile loop is not a casual stroll for everyone. If you’re traveling with kids, older legs, or you’re visiting during hot weather, consider treating it as an “option” rather than a must-do. You’ll still get plenty of viewpoint time even if you skip this hike.
Between stops, you also get a “time travel” style moment at a turnout that talks about the largest glacier in the park and how much bigger it was about 100 years ago. This is one of those narration sections that changes how you look at the scenery. Instead of just seeing big shapes, you start noticing what’s gone—ice, scale, and how rapidly mountain environments change.
In short: this part of the Teton drive helps you connect hikes and views to the bigger story of glaciation and change.
Jenny Lake, Cascade Canyon, and Mount Moran: the Tetons’ postcard trio
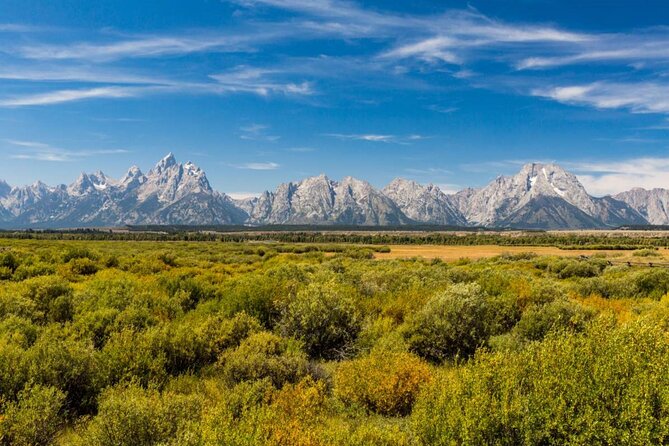
Jenny Lake is next, and it’s easy to see why it’s a go-to attraction. The narration frames it as one of the park’s most popular spots for trails and shoreline, so you know you’re stepping into a place that’s meant for both walking and lingering. It’s a good stop for splitting the group: some people can do a short look-and-go, while others take it further along the shoreline trails.
Then you hit Cascade Canyon, tied to the idea of a glacier carving the area about 12,000 years ago. Even if you don’t take a long hike here, the stop works because it gives you a direct line from a geological process to what you’re seeing in the canyon walls and slopes.
Mount Moran rounds out the trio with a long, imposing view of the 12,610-foot peak towering over Jackson Lake. This is the kind of stop where the audio adds context, but the real value is visual. You’ll understand the name after you’ve seen the scale in person.
If you like your road trip with a strong “great view now” rhythm, this section delivers.
Jackson Lake Dam and the Teton viewpoints: where detours pay off

From the Tetons’ canyon-and-lake sequence, the route flows toward the broad Jackson Lake views. At Jackson Lake Dam, you get over-the-water, mountains-beyond scenery that’s hard to duplicate elsewhere. The narration’s quick, but the stop is worth your time because it’s a natural “pause and reset” moment.
Colter Bay is the next stop, and this one adds texture. It’s described as a major camping hub with ranching history, so it’s not just wilderness wallpaper—it’s a look at how people lived alongside this scenery.
There are also optional detours that make your drive feel customized. If you choose the Cattleman’s Bridge detour, you’ll connect to remnants of early ranch life. On the way, you can also swing by Oxbow Bend, where the Snake River makes a U-turn—another classic “pull over and look” spot.
The route includes an Ansel Adams photo reference at Snake River Overlook. That doesn’t mean you should treat it like a museum stop. It’s more useful as a cue: you’ll likely find yourself matching framing and noticing why photographers keep coming back for this exact turn in the river.
Finish the detour/visual stretch at Teton Point Turnout and Glacier View Turnout, then roll into the National Elk Refuge. The narration suggests wildlife spotting especially in mornings and around dusk, and that advice lines up with how Yellowstone-area animals behave.
If you’re going to spend your limited time wisely, this chunk is where you’ll get the strongest mix of water views, wildlife odds, and “how did I get that photo?” viewpoints.
Yellowstone loop essentials: West Thumb to Old Faithful and Grand Prismatic
Once you cross into Yellowstone, the driving tour turns into a greatest-hits geothermal run. The bundle includes multiple entrance options, so your route will depend on how you enter and exit, but the core feel stays the same: geysers, hot springs, and huge volcanic features are the stars.
One of the first notable stops is West Thumb Geyser Basin, described as one of Yellowstone’s largest geyser basins. You’re looking for geothermal variety more than one single “wow” moment. This area often rewards patience—staying at the overlook a little longer rather than snapping and leaving immediately.
Shoshone Lake appears next as a secluded patch of wilderness with a great hiking trail. If you want less driving and more “walk and listen,” this is a good chance to stretch your legs.
Isa Lake is highlighted as sitting directly on the Continental Divide. That’s a cool mental hook: you’re not just seeing water and peaks—you’re seeing the backbone of the country, with the divide shaping where water flows.
Old Faithful arrives with a sense of reliability: it’s described as so dependable it once earned the nickname eternity’s timepiece. Even if you’ve seen photos, seeing it in person brings home the scale of the system behind it.
From there, Morning Glory is next. Important nuance: the narration notes that it was severely damaged by tourists over the years. It’s still listed as a sight, but this stop is a gentle reminder to keep your distance and follow the boardwalk rules.
Then comes Firehole River, described as naturally heated by nearby hot springs—so yes, it’s a hot river, and it’s another way to connect the geothermal activity to the way water moves through the ecosystem.
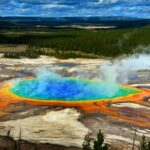
Finally, Grand Prismatic is your big-ticket geothermal color story. The narration describes shocking rings of color in a huge hot spring. This is one of those Yellowstone stops where you’ll feel like you understand why the park is famous after you see the range of tones in person.
Mud pots, geyser basins, and the Norris temperature brag
Not all Yellowstone geothermal features are dramatic eruptions. Some are constant motion, color, and bubbling, which is why the route keeps giving you different textures.
Fountain Paint Pot is next, labeled as a colorful mud pot that’s constantly burbling and rearranging itself. That’s the key idea. You’re not just looking at a static scene; you’re watching a living, unstable surface.
Artists Paint Pots continues the theme. The route includes a boardwalk so you can see multiple small geysers and the colorful mud pots without needing a hard hike. If you’re with mixed ages or different fitness levels, boardwalk sections like this make a big difference.
Then Norris Geyser Basin shows up with a specific claim: it’s the oldest, hottest geyser basin in Yellowstone, with temperatures measured up to 459 degrees below the surface. Even if you don’t remember the exact number, it helps you understand that this isn’t just pretty steam. It’s extreme heat with a long history in the park’s geology.
These stops make a strong case for doing Yellowstone by car with audio support. You’re getting the context for what you’re seeing at each stop—why it looks different from the next pullout.
Mammoth terraces, Boiling River, and the falls and hot-water variety
Yellowstone gets broader as the route continues. Mammoth Hot Springs is included, described as one of the park’s most picturesque features, with terraced hot springs that also attract elk. This is one of those stops where a quick photo isn’t enough if you want the full effect. The terraces shift the way you think about hot water: it’s not just a pool, it’s a sculpting process.
Boiling River Hot Springs is next if you’re entering from the north entrance. The narration says the name sounds scary but the water is quite pleasant. That’s helpful guidance, because without that context many people hesitate. Still, follow all posted safety rules and boardwalk limits.
The tour also includes multiple falls. Undine Falls is listed as a 60-foot waterfall, and Wraith Falls as an 80-foot waterfall trailhead nearby. If you want a break from geothermal steam, falls give you visual motion and cooler air—plus they tend to be easier to access than long backcountry hikes.
Then Tower Junction and the Roosevelt Arch appear, with the arch described as a rusticated triumphal arch at the north entrance in Gardiner, Montana. There’s also detail about its cornerstone being laid in 1903 under supervision of the U.S. Army at Fort Yellowstone, with Theodore Roosevelt’s involvement noted. This is a quick “big picture” historical stop that helps you understand Yellowstone’s place in American conservation and park-era storytelling.
By the time you reach these pieces, Yellowstone stops feeling like a list of attractions and starts feeling like a connected system—geology, wildlife, and human history in one drive.
Lamar Valley and Yellowstone Lake: the wildlife-and-water finale
The final third is where Yellowstone’s wildlife emphasis really shows up. Lamar Valley is included as the best place in Yellowstone to spot iconic wildlife, with bison almost certain and wolves possible. You’re also told to watch for the kind of conditions that help animals feel safe enough to show themselves, so your best odds are tied to when you arrive and how patient you are.
Even the drive segments after that keep wildlife and scenic “pause points” going. Dunraven Pass is called out as one of the highest points in the park at about 9,000 feet, and Mount Washburn is listed at 10,243 feet. Both add that “why are you on this road?” sense—you’re climbing into viewpoints that explain why people chase elevations in Yellowstone.
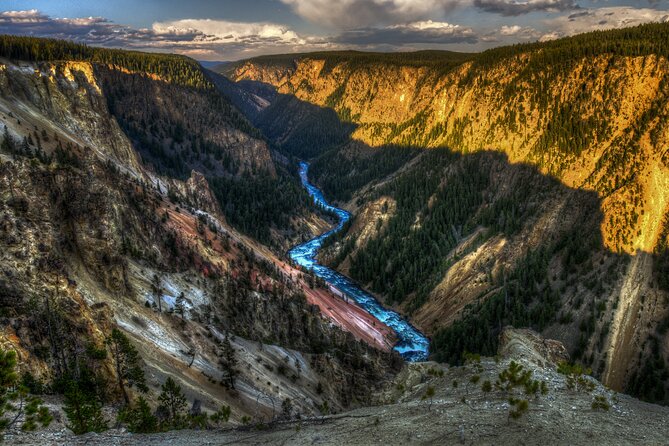
Canyon Village and Inspiration Point follow, with Inspiration Point described as the most popular overlook along the park’s Grand Canyon. That’s a useful bit of guidance because it tells you what to expect: lots of people, and a reason for it. Nearby Hayden Valley is described as lush green today but once at the bottom of a lake, which adds another “time layer” to what you’re seeing.
The route then reaches Fishing Bridge with a story about the park service’s early attempts to boost visitation by introducing invasive trout. It’s not just trivia; it gives you context for why ecosystems and management matter inside a place like this.
Finally, Yellowstone Lake ends the drive segment. It’s described as the largest high-elevation lake in North America. The tour notes it’s too cold for swimming but it’s great for a picnic or a boat ride. This is a satisfying closing note because it’s not only geology—you get a calm water ending after all the steam, color, and motion.
If you want a “finish strong” finale, this last stretch helps you do it.
Timing, setup, and how to prevent audio stress
This bundle works best when you treat setup like part of the trip. Download the tour while you’re on strong Wi‑Fi/cellular, then test playback before you’re stuck in a long park drive. Once you’re rolling, connect your phone to the car stereo via Bluetooth/USB/AUX so you’re not juggling volume buttons and interruptions.
It also helps to keep a steady driving rhythm and stick to the tour route. The audio sync is designed around your position and speed cues, and some interruptions are tied to straying too far off the intended path or pausing too aggressively.
In real-life use, you’ll want a simple rule: if you start the tour, let it run rather than turning it off and on repeatedly. If you do take a side trip, you should be ready for the app to find you again when you return to the route, but you’ll waste less time if you keep your detours short and rejoin quickly.
For most groups, the day plan is straightforward. You’re looking at about 7–8 hours for the bundle total, but each park section is roughly 3–5 hours. That matters because you can choose to do Tetons first, then Yellowstone, or split across days if you prefer slower mornings and more photo breaks.
One last practical point: park entry tickets and reservations aren’t included. Build your budget and timing around park rules, parking reality, and road closures.
Who should book this self-guided audio driving bundle?
I think this works best for people who want a lot of major stops without committing to a fixed guided schedule. Families love it because everyone can move at their own speed: you can park for a short viewpoint, then roll back into the car and let the audio do the next explanation.
Couples and solo road trippers usually like it too, especially if you enjoy learning on the move and don’t want to spend the day reading signs. The value-per-car price is a real advantage when you’re sharing costs among up to 4 people.
If you’re the type who needs a person to manage logistics—ticket lines, crowd routing, or long hikes on a strict timetable—this might feel hands-off. But if you’re comfortable with the basic rhythm of a park road trip and you’ll download the audio in advance, you’ll likely find this bundle gives you a smart, cost-friendly way to hit Yellowstone and Grand Teton highlights in one connected loop.
Should you book this Grand Teton and Yellowstone audio drive?
I’d book it if you want a self-paced road trip with strong geothermal and wildlife storytelling, and you’re okay handling setup yourself. The offline-first design, the ability to start and pause, and the per-car pricing make it a practical option for groups up to four.
Skip it if you’re planning to rely on cellular data for audio, or if you’d rather have a live guide steering your day step-by-step. Also, make peace with the reality that Yellowstone is big and parking takes time; this tour helps you learn while you wait, but it can’t make the roads smaller.
FAQ
How much does the Grand Teton and Yellowstone self-guided driving bundle cost?
It costs $34.99 per group, up to 4 people.
How long does the tour take?
It’s listed as approximately 7–8 hours total. Each park section is described as about 3–5 hours to complete.
Is this a guided tour with a person who meets you?
No. It’s self-guided, and no one meets you at the start. You start the first story at the designated point and follow audio cues.
Does it work offline?
Yes. You need to download the tour while you have strong Wi‑Fi/cellular, and then it works offline without cellular or Wi‑Fi.
What do I need to set up before I start driving?
After booking, you’ll get instructions and a password by email and text. You download the separate Action’s Tour Guide app, enter the password, and start the tour from the correct starting point on-site.
What audio setup works best in the car?
You can connect your phone to your car’s stereo using Bluetooth, USB, or AUX. Headphones can help for walking parts.
Are park admission tickets or reservations included?
No. Attraction passes, entry tickets, or reservations are not included.
What are the opening hours?
Monday through Sunday, 8:00 AM to 5:00 PM.
Do park roads and audio require me to follow a specific route and speed?
The tour is designed to synchronize based on location, and you’re advised to stick to the tour route and the speed limit for the best experience.