REVIEW · OAHU
Kayaking Rainforest River on Oahu, Kahana River(Self-Guided Tour)
Book on Viator →Operated by Salty Kayaks Hawaii · Bookable on Viator
Kayaking on Oahu can feel almost private. This self-guided trip on Kahana River is set up for easy starts: you get safety tips, plus stable beginner kayaks (or SUPs), with life vests and 10L dry bags so you can focus on the scenery. One watch-out: there’s a steep, rocky hike at the stop(s) you reach from the water, and flip-flops don’t cut it well on lava rock.
I like that the meeting setup is simple—show up at Kahana Bay Beach Park and the provider brings your gear—so you spend less time figuring things out and more time on the water. You also get freedom to go at your pace, with a map delivered to your phone. If strong wind and currents are running, the experience can feel more challenging than the calm-water photos suggest, so plan around conditions.
In This Review
- Key highlights before you paddle
- Meeting at Kahana Bay Beach Park: gear shows up, you go paddle
- The self-guided flow: instructions up front, then go at your pace
- Kahana River scenery: calm water, lush views, and mountain backdrops
- That special water moment: little island stops and exploring by paddle
- The steep hike reality: sandals with a back, or water shoes
- What to bring: camera, dry storage, and feet-first planning
- Weather and water conditions: why “good weather” is part of the deal
- Who should book this kayak setup (and who should skip the hike)
- Price and value: why included gear and self-guided freedom matter
- Quick do’s and don’ts from real paddle mistakes
- Should you book Salty Kayaks Hawaii for Kahana River?
- FAQ
- Where is the meeting point for this kayak or SUP self-guided tour?
- How long is the Kahana River self-guided kayaking experience?
- Do I need to be an experienced kayaker?
- Is this tour guided by an instructor on the water?
- What gear is included with the tour?
- Can I choose a SUP instead of a kayak?
- Is this a private activity?
- Are service animals allowed?
- What should I do if the weather is poor?
Key highlights before you paddle
- Beginner-stable kayaks or optional SUP for an easier first-time outing
- 10L dry bags + life vests included, so you don’t have to pack bulky extras
- On-the-water freedom with self-guided instructions and a phone map
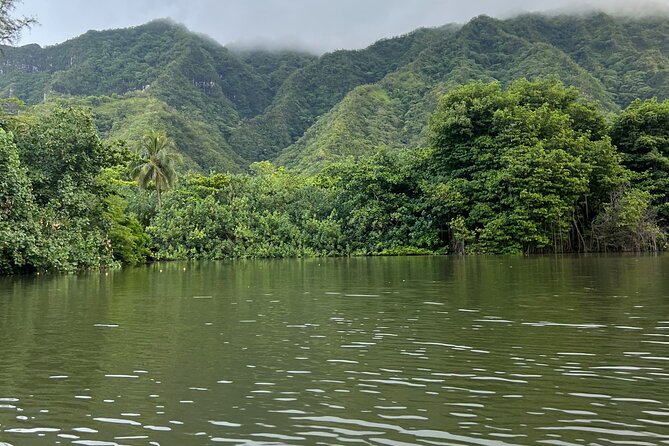
- Rainforest + mountain views from the quiet Kahana River route
- A steep shoreline stop that rewards you with big views, but demands real footwear
Meeting at Kahana Bay Beach Park: gear shows up, you go paddle
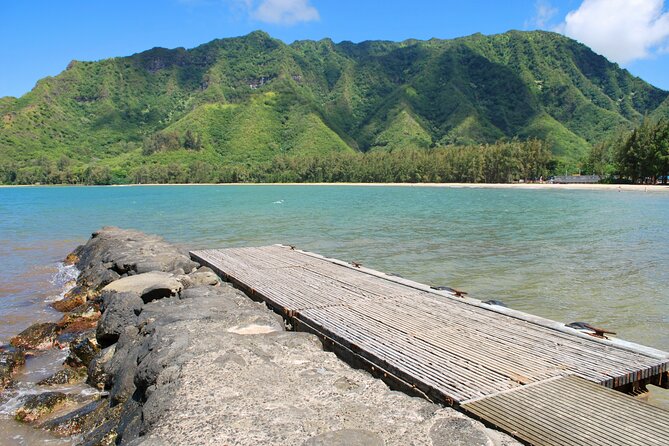
This tour is built around a low-stress start. You meet at 54-52 Kamehameha Hwy, Hauula, HI 96717, at Kahana Bay Beach Park, then the team delivers the kayaks (or SUP boards) and the needed gear to you. That matters more than it sounds. When you’re on vacation, wrestling with parking, carrying gear, and trying to confirm where to check in can eat half your energy. Here, the setup is meant to be quick and straightforward.
Because it’s private for your group, you’re not paddling around a crowd or waiting your turn for gear. And you’re not stuck with a nonstop lecture either. You’re given the instructions and safety best practices first, then you’re free to enjoy the route on your own.
Practical tip: bring a phone you’re comfortable keeping with you (you’ll be using the map provided). If you don’t love taking your phone near water, keep it in the dry bag and rely on the map anyway—most phones handle the screen brightness and navigation fine, even with basic care.
You can also read our reviews of more tours and experiences in Oahu.



The self-guided flow: instructions up front, then go at your pace
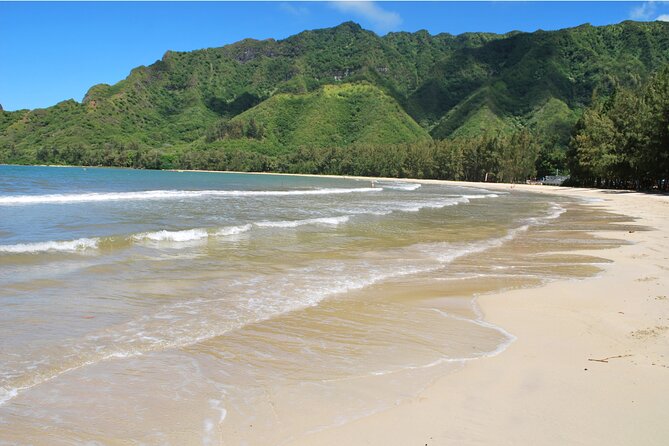
The format is classic self-guided done the right way: you start with activity instructions and safety tips, and the kayaks are described as beginner-friendly—stable and easier to handle. That’s a big deal for a first-time paddler. A stable kayak reduces the mental load, so you spend less time compensating and more time enjoying the water and views.
You’ll typically want to use your first few minutes to get comfortable with:
- Steering with gentle strokes, not big flails
- Keeping your balance relaxed (tight muscles make paddling feel harder)
- Reading the water for chop or current before committing to any longer paddle sections
The tour is about 3 hours total, so this isn’t a full-day expedition. It’s long enough to settle in and enjoy the scenery, but short enough that you can still feel fresh when you dock.
And yes, there’s an optional SUP choice. If you’ve stood on a board before, you might like the extra sense of height and easy scanning for scenery. If you’re brand new to SUP, a kayak can feel steadier and less wobbly.
Kahana River scenery: calm water, lush views, and mountain backdrops
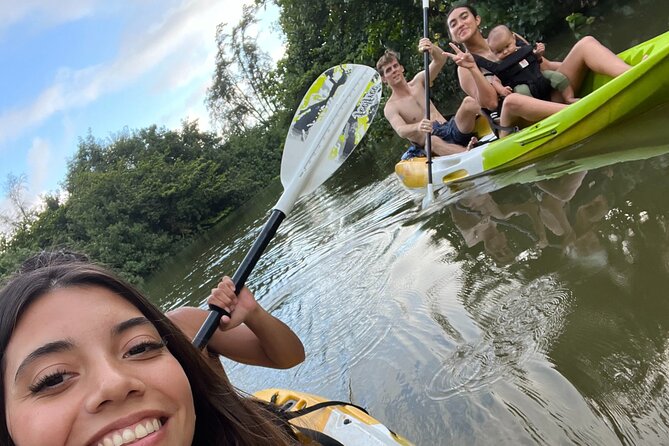
What you’re paying for here is the vibe: peaceful paddling along Kahana River with lush rainforest and majestic mountain views. When the water is cooperating, it’s exactly the kind of Hawaii outing that feels like a reset button. You’re not sprinting between checklists. You’re moving slowly enough to take in the details—how the shoreline looks, how the light changes along the river, and how the air feels cooler near the water.
One thing to keep in mind: a river outing can still meet real ocean influence depending on where you paddle and how wind is behaving. The experience description emphasizes peaceful scenery, but you should also take the rough-water caution seriously—one past paddling experience flagged wind, currents, and lava rock around the area.
So my rule for Oahu kayaking is simple: enjoy the calm when it’s there, but don’t assume it will always be smooth. If you arrive and wind feels punchy, you can still go—but you should expect more effort and you should keep your route conservative.
That special water moment: little island stops and exploring by paddle
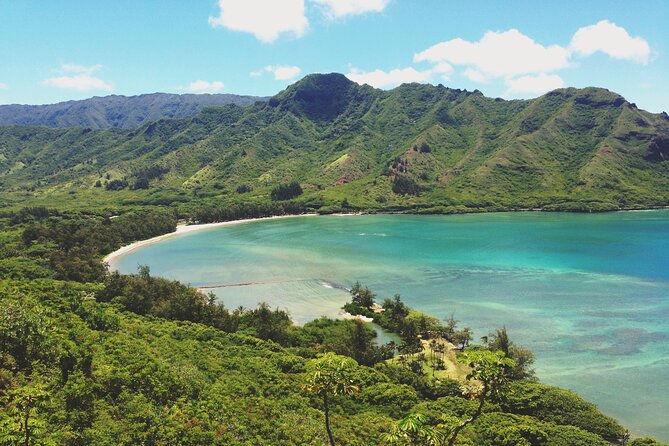
Some of the most memorable parts of this trip come after you get off the main paddle route and explore a nearby islet/cove area. There are hints in what people did—paddling to a little island, docking on different sides, and exploring a secret cove.
What’s great:
- The paddle can feel like a fun detour rather than just point-to-point
- You get a chance to break the routine and explore a small shoreline area
- Snorkeling was tried by at least one person around the island, though fish sightings weren’t guaranteed
What to know before you picture postcard snorkeling: water visibility and fish activity can vary, and the ocean conditions matter. If your goal is underwater wildlife, treat snorkeling as a bonus, not the main promise.
Also, don’t ignore the shoreline reality. One caution note is clear: there’s lava rock, and it can be sharp. That’s why footwear shows up again and again as the difference between a fun outing and a painful one.
The steep hike reality: sandals with a back, or water shoes
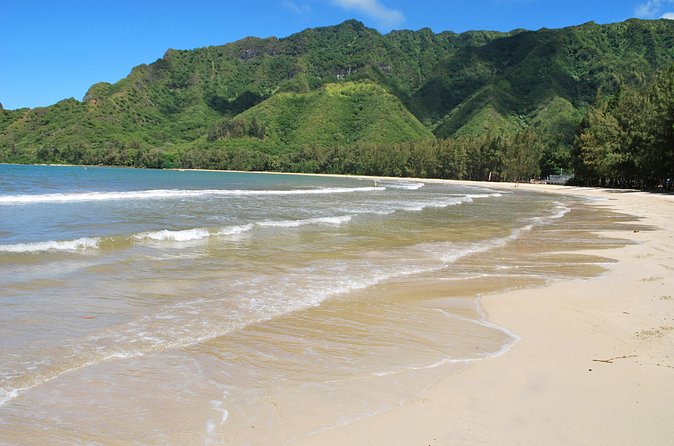
If you do one thing to prepare for this tour, make it footwear. Multiple paddlers linked the shoreline hike with serious difficulty. The climb is described as steep, with rockier sections that feel more like scrambling than a simple walk.
Here’s the practical takeaway:
- Wear sandals with a back strap (not just flip-flops) if you’re going that route
- Or better yet, wear water shoes that protect your feet and grip lava rock
One very direct warning came from a paddler who removed flip-flops and hiked barefoot—burned and torn feet follow. Lava rock doesn’t play nice, especially under sun heat.
Even if you’re fit, expect the hike to take more out of you than you’d guess from the short description of a “viewpoint.” Plan to go slow, keep your center of gravity stable, and don’t rush down. Gravity always wins on rocky slopes.
If you’re traveling with kids or anyone who dislikes climbing, decide ahead of time whether you’ll join the hike or just stay at the water area. The best plan is the one that keeps you safe and happy, not the one that forces everyone to prove toughness.





What to bring: camera, dry storage, and feet-first planning
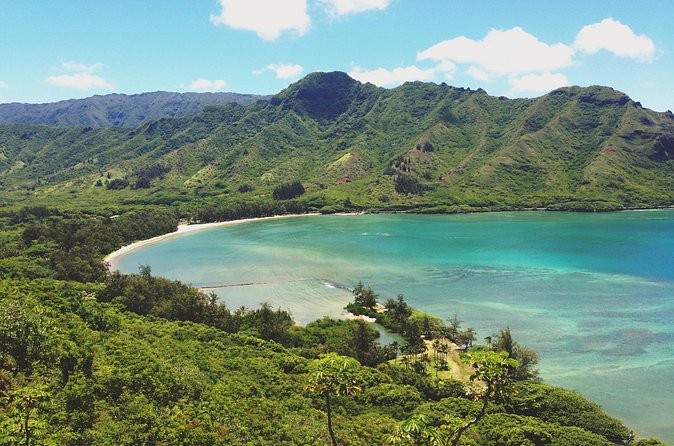
The provided gear covers the essentials for water time: life vests and 10L dry bags for your belongings. But you still need to show up smart. I recommend packing lightweight items and thinking about heat and sun.
Bring:
- A camera (you’ll want it for rainforest views, mountain scenery, and the viewpoint)
- Sun protection (hat, sunscreen, and sunglasses if you use them)
- A footwear solution that can handle steep rocky surfaces
You’ll also want a small plan for what goes where:
- Dry bag: phone, camera, keys, wallet
- Easy-to-grab items: anything you need during the hike setup
If you’re bringing a phone, don’t rely on memory for the route—use the phone map that gets provided to help you get your bearings fast.
Weather and water conditions: why “good weather” is part of the deal
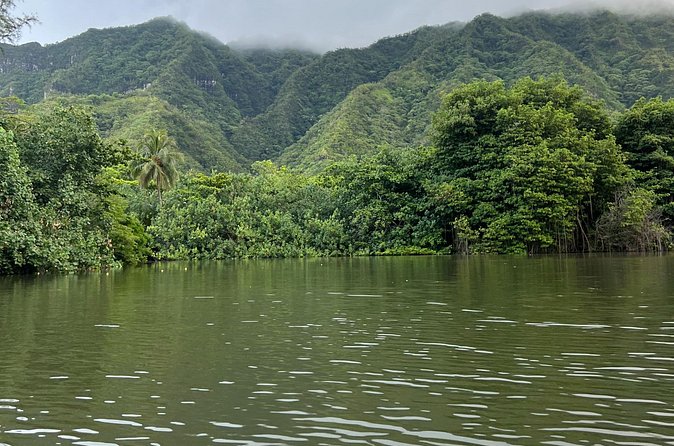
This experience requires good weather. If conditions aren’t right, you’ll be offered a different date or a full refund. That’s not just fine print. It’s because wind and current can change the experience.
One past paddling experience called out strong wind and currents, plus lava rock, plus the possibility of getting cut if your feet or approach aren’t protected. Another described an ocean-side reality where wind made the paddle feel rough.
Here’s how you can use that information without overthinking it:
- If the water looks choppy and wind is strong, dress and paddle like it’s more active than “peaceful river”
- Keep your expectations flexible—use the scenery as your goal, not speed
- Stay aware during docking and shoreline steps, since lava rock is the main injury risk
If you’re the type who hates surprises, check the conditions before you go and choose clothing that handles sweat and spray.
Who should book this kayak setup (and who should skip the hike)
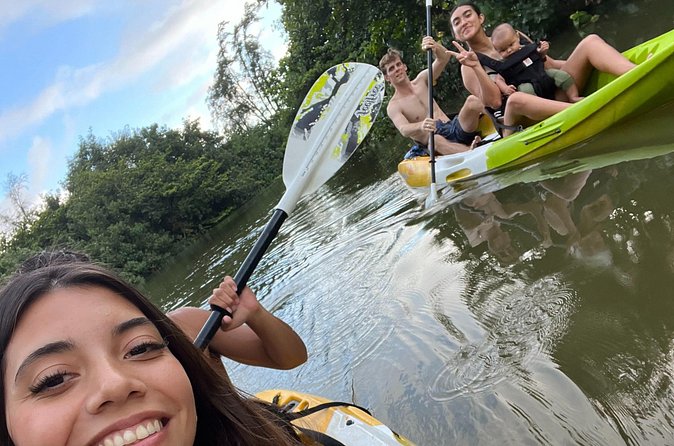
This tour is designed so most travelers can participate, and the kayaks are intended to be beginner-friendly and stable. That makes it a good match if you want a real Oahu paddle without signing up for an advanced skills test.
It’s also a good fit if you like:
- Self-guided pacing
- A quiet outdoor experience away from the biggest crowds
- A mix of water time plus a scenic stop that rewards effort
But I’d be cautious if you:
- Don’t feel comfortable with steep, rocky hiking
- Want a purely flat, easy outing
- Are traveling with limited mobility and can’t safely handle uneven terrain
If you’re unsure, ask yourself: can you safely walk uphill on rocky ground and then return the same way? If the answer is no, you can still enjoy the water—but you should avoid forcing the hike portion.
Price and value: why included gear and self-guided freedom matter
There’s no point comparing this to a guided tour if your needs are different. Here, the value is in what’s included and how the time is structured.
You get:
- Kayaks/SUPs suited for beginners
- Life vests included
- 10L dry bags for your belongings
- Up-front instructions and safety tips
- A phone-friendly map for your self-guided route
For most people, that package means fewer rental items, less prep time, and more actual paddle hours. You’re not paying extra just to have someone steer for you. You’re paying for a setup that lets you do the activity your way—while still covering safety basics.
If you’re budget-aware, the “included gear” part is usually what makes the math work. If you were to rent a kayak plus buy dry storage plus figure out where to go, self-guided quickly becomes more expensive and more stressful.
Quick do’s and don’ts from real paddle mistakes
If you want this to feel fun instead of stressful, follow the themes people highlighted:
Do:
- Wear secure footwear that protects from lava rock
- Use the phone map so you don’t wander or second-guess your route
- Bring a camera and take breaks to enjoy the views
Don’t:
- Assume flip-flops are fine on rocky stops
- Underestimate wind and current on the day you paddle
These are simple choices, but they hit the biggest risk areas: feet and conditions.
Should you book Salty Kayaks Hawaii for Kahana River?
I’d book this if you want a beginner-friendly kayak or optional SUP outing that mixes quiet rainforest scenery with a more memorable shore stop—especially if you like self-guided freedom. The included life vests and 10L dry bags make it easier to show up light and paddle sooner.
I’d hesitate if you don’t want the hike portion or you’re unprepared for rocky terrain. The viewpoint reward is real, but the climb is also real.
If you match the “I can handle steep, rocky steps with the right shoes” mindset, this is one of those Oahu activities that feels like you found time outdoors for yourself—not just another stop on a list.
FAQ
Where is the meeting point for this kayak or SUP self-guided tour?
You start at Kahana Bay Beach Park at 54-52 Kamehameha Hwy, Hauula, HI 96717, USA, and the activity ends back at the same meeting point.
How long is the Kahana River self-guided kayaking experience?
The tour is about 3 hours.
Do I need to be an experienced kayaker?
No. The kayaks are described as for beginners and stable and easy to use.
Is this tour guided by an instructor on the water?
No. This is a self-guided tour. You’ll receive activity instructions and safety tips before you go, and you’ll have a map provided to your phone.
What gear is included with the tour?
You get a life vest and the kayaks or SUPs, plus 10L dry bags for your belongings.
Can I choose a SUP instead of a kayak?
Yes. SUP is listed as an optional choice.
Is this a private activity?
Yes. Only your group will participate.
Are service animals allowed?
Yes, service animals are allowed.
What should I do if the weather is poor?
This experience requires good weather. If it’s canceled due to poor weather, you’ll be offered a different date or a full refund. You can also cancel for free up to 24 hours in advance.