REVIEW · ZION NATIONAL PARK
Self-Guided Audio Driving Tour in Zion & Bryce Canyon
Book on Viator →Operated by GuideAlong (GyPSy Guide) · Bookable on Viator
Zion and Bryce are big. This self-guided GPS audio tour turns the driving into the guidance, with stories and directions that play as you pass each spot—plus it can work offline once downloaded. It’s a simple way to avoid the usual guesswork and still feel like you’re making the day your own.
I especially love the location-based autoplay. The narration reacts to where your car is, so you don’t have to keep tapping menus. I also like the value: it’s $26.99 per group up to 8, which makes it a lot easier to justify for families and small road-trip crews.
One possible drawback: you have to manage a phone app setup and download ahead of time. If your connection or phone access is flaky, the tour can feel like extra work before you even start rolling.
In This Review
- Key things that make this tour worth your time
- How the GPS audio tour works between Zion and Bryce
- Price and value: $26.99 per group up to 8 (and what’s still on you)
- Planning your day: from La Verkin to Panguitch at your own pace
- Zion Canyon: Emerald Pools, Weeping Rock, and the “easy-to-moderate” hike rhythm
- Emerald Pools (Lower Pool to optional Middle/Upper)
- Weeping Rock Trail (short walk, big reward)
- Springdale and The Narrows: how to plan for the water part
- Grotto Trail and Angel’s Landing: worth reading before you commit
- East Zion photo stops: Checkerboard Mesa and a ghost-town detour
- Checkerboard Mesa
- Grafton Ghost Town (and why it feels like bonus travel)
- The Zion–Mt. Carmel Tunnel: one-lane reality on Highway 9
- Springdale to Bryce: driving Highway 12 and Red Canyon photo stops
- Bryce Canyon rim views: Inspiration Point, Sunset Point, and Bryce Point
- Inspiration Point: three views in one
- Sunset Point: close-up hoodoos and Navajo Loop trailhead
- Bryce Point: wide first views and an easy rim-trail choice
- The Amphitheater and the 18-mile Scenic Drive: stop when you want, not when you must
- Queens Garden and Navajo Loop options: how the audio helps you mix hikes
- Sunrise Point and the Amphitheater from the entrance side
- Queens Garden Trail: 1.8 miles, with a flexible plan
- Where this tour shines (and who it suits best)
- A quick heads-up on the only real friction points
- Should you book this self-guided Zion and Bryce audio drive?
- FAQ
- Is the audio tour GPS-based?
- Can I use the tour offline?
- How long does the tour take?
- What language is the tour in?
- Where can I start and end the tour?
- What’s included in the price?
Key things that make this tour worth your time

- GPS-guided narration that plays based on your exact location, so you can focus on the road and the views
- Offline use after download, which helps a lot inside busy park areas
- Start and stop anywhere along the route, instead of being stuck to a fixed schedule
- Stop-by-stop options that mix drive-outs and short hikes, so you can match your energy level
- Road-trip detours like Grafton Ghost Town, which you might miss on your own
- Long-term purchase with no expiry and free updates
How the GPS audio tour works between Zion and Bryce
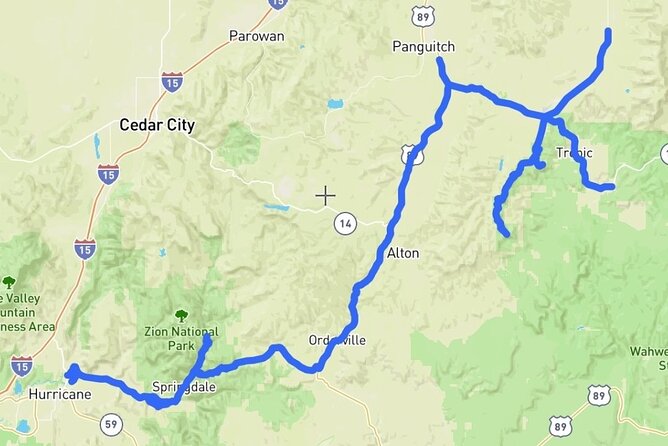
Think of this as a narration layer on top of your drive. You open the GuideAlong app, redeem your voucher code, and download the tour under My Tours. Once it’s downloaded, the audio doesn’t need data to keep going.
When you’re on the road, the commentary plays automatically using your phone’s GPS chip. That means you’ll hear the right stories and directions at the right time—whether you’re circling for parking, pausing for photos, or deciding to skip a stop and move on.
This is also what makes the audio feel more useful than a generic “point and read” guide. Instead of you trying to match landmarks on a map, you follow the audio cues. You get behind-the-scenes context, practical tips, and what’s worth stopping for versus what you can safely glance at from the car.
Price and value: $26.99 per group up to 8 (and what’s still on you)
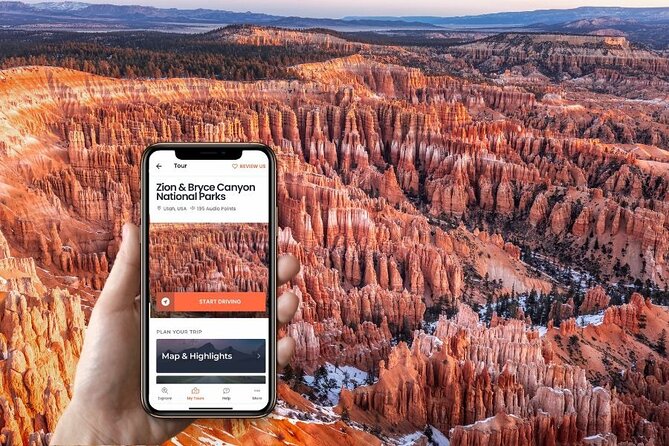
The tour price is $26.99 per group for up to 8 people. For a car load, that’s the big win. Even if you’re a solo driver, the per-group model can still make sense if it replaces a need for multiple guidebooks or multiple paid guided stops.
Also, note the tour includes guidance, but it doesn’t include national park access. The stop descriptions say admission ticket free for the listed viewpoints and walks, but the experience does not include entrance fees or national park passes. Plan on having the right park entry method for Zion and Bryce on your own.
The tour also doesn’t include reservations. That matters if you’re trying to line up timed hikes or specific services. On the plus side, the audio style fits well with flexible schedules: you can do it as a long day or stretch it across parts of multiple days.
Planning your day: from La Verkin to Panguitch at your own pace
The tour start is La Verkin, UT 84745, and the tour end is Panguitch, UT 84759. Here’s the key practical benefit: you don’t have to treat those as strict bookends. The narration is location-based, so you can start and stop along the route wherever it fits your parking and timing.
The total time is listed as about 6 hours to 1 day. In real terms, that range depends on how many short walks you add (Emerald Pools, Weeping Rock, the Narrows riverside section, and rim-view trails in Bryce). If you keep it mostly drive-and-pause, it’s a half-day feel. If you step into the hikes and scenic pullouts, you’ll likely creep toward a full day.
One more thing I like: the narration includes trip planners in-app, web, and PDF. Even if you create your own route, having suggested half-day, full-day, or multi-day structures helps you avoid building an impossible agenda.
Zion Canyon: Emerald Pools, Weeping Rock, and the “easy-to-moderate” hike rhythm
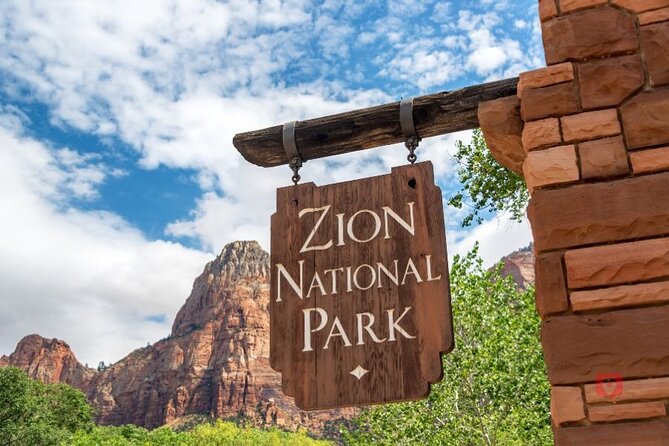
Zion does best when you pace yourself. The audio tour helps you do that by feeding you the most rewarding stops first, with clear expectations about effort.
Emerald Pools (Lower Pool to optional Middle/Upper)
Emerald Pools is on the Zion Canyon Scenic Drive area. The walk to the Lower Emerald Pool is described as a favorite that’s not overly strenuous, but it still takes about 60–90 minutes total for most visitors because you’re on an unpaved path.
What makes this stop special is the feel. You can walk behind the spray of the waterfall in a cave-like overhang. That’s the kind of moment that turns a quick stop into a memory.
The Middle and Upper Pools are optional. The audio notes that the continuation is more strenuous, so you can decide in the moment whether to go on or turn around. That’s smart in Zion, where one “just a little farther” decision can snowball into a long day.
Weeping Rock Trail (short walk, big reward)
Next up, Weeping Rock Trail is a classic Zion energy-saver. It’s only about a 1/4 mile uphill walk, and the payoff is a hanging garden and a waterfall experience where you’re basically on the inside of the action.
The tour frames it as around 30 minutes, which makes it perfect as a reset stop between longer activities. It’s also a good point to consider bigger hikes later, since the audio references other major routes that depart from the area (Hidden Canyon and Observation Point), even if you don’t do them today.
Springdale and The Narrows: how to plan for the water part
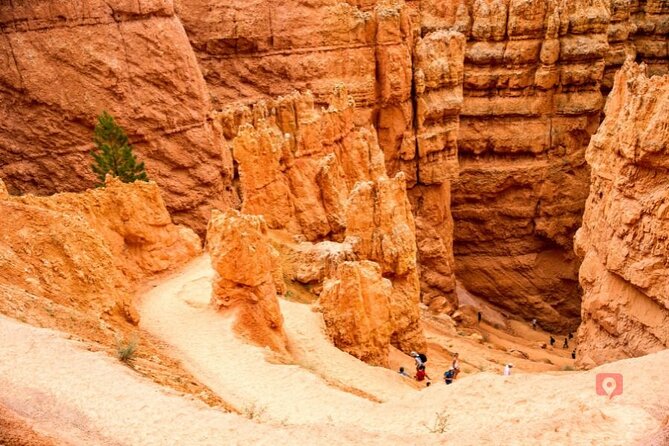
Springdale is the practical base for Zion. The tour positions it as a full-service town right by the south entrance, with hotels, restaurants, cafes, and galleries. If you’re road-tripping, it’s where you’ll most likely handle last-minute supplies before you head into the park.
If you’re planning The Narrows, the audio tour gives you a clear mental picture of what changes. First there’s the Riverside Walk to Temple of Sinawava, and then the main event begins once the trail becomes the river itself.
The tour also spells out the gear reality. The water is described as chilly, so plan on wading gear, canyoneering shoes for grip, a dry sack for valuables, and a sturdy walking pole. It even notes typical distance habits: many average hikers go 3–4 miles before turning back. Depth is usually ankle deep, with some places reaching waist deep.
That’s valuable because it helps you avoid the classic mistake of treating The Narrows like a standard canyon walk. Even with easy days, water hike days demand respect for footing and temperature.
Grotto Trail and Angel’s Landing: worth reading before you commit
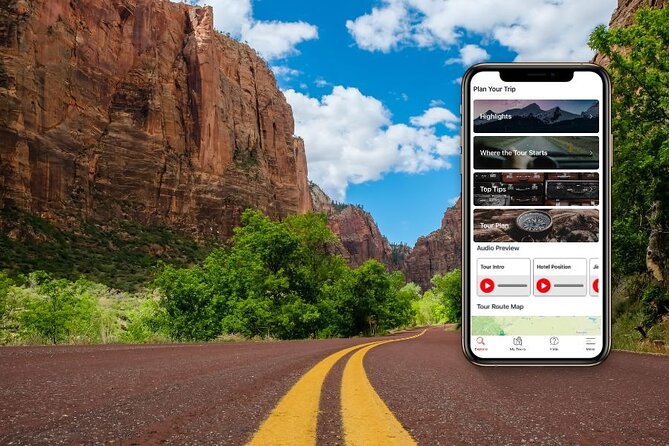
The Grotto Trail is described as an easy, flat walk that many people use to stretch their legs and access Zion Lodge. But the real reason the audio calls it out is Angel’s Landing.
Angel’s Landing is positioned as a challenging hike for experienced and prepared hikers comfortable with heights. The tour highlights the mentally tough section: a narrow ledge with the exposure noted as about 1,500 feet above the valley floor. The overall hike distance is listed as 5 miles with significant elevation gain.
I like how the narration sets expectations clearly. If you’re not feeling it, you don’t need to “tough it out” because you already bought a tour. If you are feeling it, at least you’re not walking in blind about what kind of hike it is.
East Zion photo stops: Checkerboard Mesa and a ghost-town detour
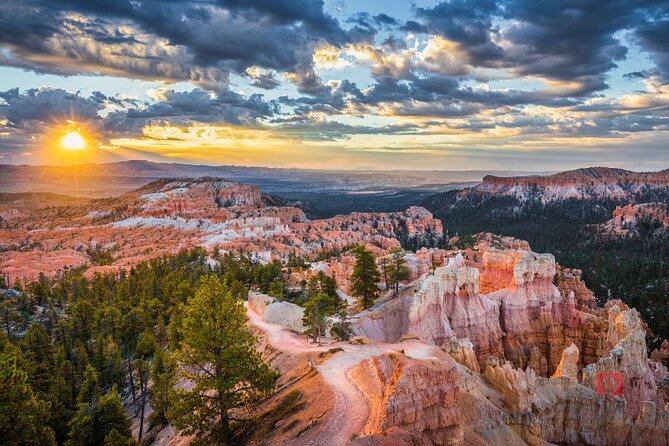
Zion has a second face on the drive over toward East Zion, and the audio tour uses that time for great roadside stops.
Checkerboard Mesa
Checkerboard Mesa is flagged as the most photographed landmark in East Zion. The tour describes the rock half-cone with horizontal and vertical cracks that create the checkerboard look. There’s a dedicated pullout for photos, and the narration keeps the stop time tight (about 20 minutes), which makes this a perfect “get the shot, keep moving” stop.
Grafton Ghost Town (and why it feels like bonus travel)
One of the strongest bits of tour praise is that it adds a fun detour: Grafton Ghost Town. The audio explains the turnoff near Rockville on Highway 9 and then crossing to the south side of the Virgin River for a short drive to the site.
This is the kind of extra that makes a self-guided tour feel less like checklist travel and more like discovery. It’s also short—about 30 minutes—so it doesn’t steal half your day.
The Zion–Mt. Carmel Tunnel: one-lane reality on Highway 9
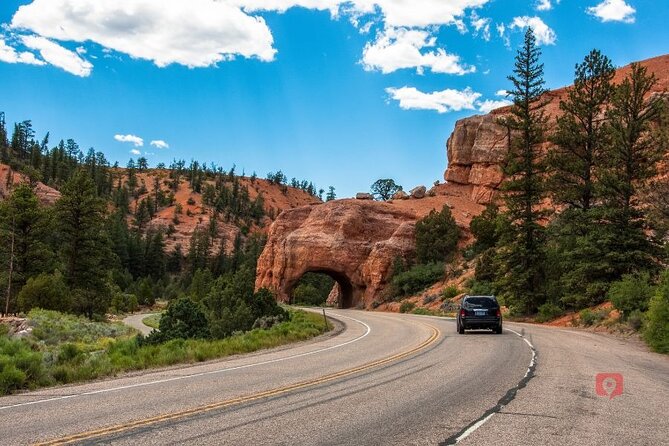
Highway 9 cuts across Zion and includes steep switchbacks that climb about 1,000 feet. The tour then points you to the Zion–Mt. Carmel Tunnel, which is unusual because it’s one lane wide.
The notes explain that the tunnel can only accommodate larger vehicles in one direction at a time, and that park rangers use a system to get traffic through. Translation: expect it to be a slow moment. It’s not a “speed” drive segment, and the audio helps you stay patient instead of tense.
There’s also a practical lesson from the tour feedback: road details can change. One update mentioned that a tunnel description needed correction (single-lane vs. two-lane). If you’re driving a big vehicle, follow current park signage and ranger directions first, then use the audio as extra context.
Springdale to Bryce: driving Highway 12 and Red Canyon photo stops
To connect Zion and Bryce, the tour routes you across Highway 12 toward Bryce via the main corridor. It also points out a Red Canyon pass and an easy photo break.
The audio calls out two short tunnels carved through rock fins that let the highway pass through. If you like quick “pull over and shoot” moments, this is a good place to stretch without committing to a hike.
Bryce Canyon rim views: Inspiration Point, Sunset Point, and Bryce Point
Once you hit Bryce Canyon National Park, the audio tour shifts from Zion’s canyon routes to the rim-view system—where short stops can be huge.
Inspiration Point: three views in one
Inspiration Point is described as three different views combined into one, with three tiers opening down into the Silent City. It’s also where you’ll notice color bands in the hoodoos—white, pink, and rust colored.
Stop time is about 20 minutes, which fits Bryce well. You can take in the grand view fast, then decide if you want to hike next or keep your day moving.
Sunset Point: close-up hoodoos and Navajo Loop trailhead
Sunset Point is another 20-minute stop that brings you closer to the hoodoos and highlights details of erosion patterns. The tour even names formations like Thor’s Hammer.
It also acts as the starting point for a favorite hike: the Navajo Loop Trail. The loop is listed as 1.3 miles, and the audio notes that it’s steep in places. It also mentions hikers passing through formations called Wall Street and Two Bridges. If you want hoodoo time without a long commitment, this is the kind of hike you can fit into a drive day.
Bryce Point: wide first views and an easy rim-trail choice
Bryce Point is described as a best-place pick for first views—farthest away for grand, wide shots of the Amphitheater. It’s also the southern end point of the Rim Trail.
Here’s the practical angle: if you want to walk the rim trail for more continuous views, you can park here and later catch the free shuttle to get back to your vehicle. The audio points this out as an easy way to turn a viewpoint stop into a short walking day.
The Amphitheater and the 18-mile Scenic Drive: stop when you want, not when you must
Bryce’s main star is the Amphitheater, and the tour doesn’t treat it like a single photo stop. It connects you to a longer scenic system: an 18-mile Scenic Drive that continues to Rainbow Point, the highest and southernmost location in the park.
The narration notes there are at least 8 pullouts and viewpoints, and you can choose to stop at some or all. It also lists favorite pullouts: Rainbow Point, Agua Canyon, Natural Bridge, and Farview Point.
This is one of the tour’s strongest ideas for self-guided travel. In a park where viewpoints stack up quickly, you need options. The audio gives you permission to pick your own intensity level without feeling like you missed the “right” stop.
Queens Garden and Navajo Loop options: how the audio helps you mix hikes
The tour ties Bryce hikes to specific rim points, which is what makes it useful for planning on the fly.
Sunrise Point and the Amphitheater from the entrance side
Sunrise Point is described as the Amphitheater viewpoint closest to the entrance. The audio emphasizes close-up views of balanced spires and formations.
Queens Garden Trail: 1.8 miles, with a flexible plan
For hiking into the Amphitheater, the narration points you to Queens Garden Trail. It can be done as an out-and-back for 1.8 miles, or you can combine it with the Navajo Loop Trail and finish at Sunset Point.
That matters because it gives you a realistic route option when your legs are either ready for a loop or you’d rather keep it simpler.
Where this tour shines (and who it suits best)
This tour is best for you if you like to drive, stop often, and learn without hiring a live guide for every hour. The combination of GPS-aware narration and short, named stops is ideal for road trips with mixed interests—because not everyone has to do the same hike.
It’s also a good fit if you want practical, science-and-history style context. The tour feedback includes examples of answers that go beyond what people expect, like rock formation timing (including the idea that rocks were formed about 200 million years ago under the ocean). That kind of detail is exactly what makes a drive feel educational instead of just scenic.
One more smart match: it’s a private tour/activity, meaning only your group participates. For families and friends sharing a car, that reduces the “group mismatch” stress you get with some guided options.
A quick heads-up on the only real friction points
Two issues show up clearly in the tour feedback and the setup instructions themselves.
First: app access. One review described trouble accessing the tour after purchase, and another said downloading the audio didn’t work and that the system felt too complex. This doesn’t mean the tour is broken, but it does mean you should plan for time to download and test before you’re out in the parks.
Second: changing road details. One review noted an update was needed for tunnel lane information. Even with good audio guidance, park roads can change. For safety and logistics, always follow current ranger instructions and posted signs.
Should you book this self-guided Zion and Bryce audio drive?
I’d book it if you’re doing Zion and Bryce as a driving day and you want a guide that works where you are, not where someone else’s itinerary says you should be. The GPS-based autoplay, offline option, and stop-by-stop structure make it feel efficient and fun instead of “read-and-forget.”
I’d hesitate if you hate phone apps or you know your device setup is unpredictable. This isn’t a paper-only guide where you can ignore technology. You’ll want the time to download the tour, then keep your phone charged.
If you’re cost-conscious and traveling with a group of up to 8, the per-group pricing is where this becomes a strong value. Pair that with optional hikes like Emerald Pools and Navajo Loop, and you get a day that mixes big views with manageable effort.
FAQ
Is the audio tour GPS-based?
Yes. The audio plays automatically based on your location using your phone’s GPS, so the narration matches where you are as you drive.
Can I use the tour offline?
Yes. After you download it in the GuideAlong app, you can use it offline with no internet or cell service needed.
How long does the tour take?
The tour is listed as about 6 hours to 1 day, depending on how many stops and walks you add.
What language is the tour in?
The tour is offered in English.
Where can I start and end the tour?
It lists a start in La Verkin, UT 84745 and an end in Panguitch, UT 84759. You can also start and end anywhere along the tour route because the audio follows your GPS location.
What’s included in the price?
The price includes the GuideAlong GPS audio tour with stories, tips, and directions, plus trip planners. Entrance fees, national park passes, and reservations are not included.